Disclaimer: This article is a bit old and does not apply to recent versions of the corona sdk. It is put here for educational purpose, showing how one may try to break into this kind of applications. It is not a magic formula for hacking all corona apps across all versions of the sdk.
SailsJS tutorial | expenses tracking app (Part 4/4)
In the previous parts,
we’ve set up a sails application, added some styles and views and implemented a solid backend. It’s now time to finish this application. We will implement the front-end, adjust a few settings and give some tracks to continue the development.
The app page
To render our app page, let’s open the MainController (in api/controllers) and replace the contents of the app action with1
2
3
4
app: function (req, res) {
  res.view();
}
What this does is it renders the view views/main/app.ejs because we are in the app action of the MainController. You should have already added this view in part 2.
Next we only want logged-in users to access our app so let’s add the following lines in config/policies.js1
2
3
4
MainController: {
  'app': ['passport', 'sessionAuth']
},
Also we want some more information about our users than we currently get, like their profile picture and full name. To do this, we’ll need to hack a bit into what sails-generate-auth generated us. Open api/services/passport.js, line 82 there’s the code fetching user attributes
  // If the profile object contains a list of emails, grab the first one and
  // add it to the user.
  if (profile.hasOwnProperty(‘emails’)) {
    user.email = profile.emails[0].value;
  }
  // If the profile object contains a username, add it to the user.
  if (profile.hasOwnProperty(‘username’)) {
    user.username = profile.username;
  }
// If neither an email or a username was available in the profile, we don’t
// have a way of identifying the user in the future. Throw an error and let
// whoever’s next in the line take care of it.
if (!user.username && !user.email) {
return next(new Error(‘Neither a username nor email was available’));
}
1 | **Remove all this** and insert this instead: |
Scripting
This tutorial aims to be neutral regarding what client technology you use, therefore we we’ll do DOM stuff “manually” with jquery and only use backbone and underscore to have a tidy collection of expenditures. You’ll be able to follow even if you’ve never heard of backbone.
First, download this archive. It contains templates, js models and libs as well as a skeleton for our app script. Copy the assets into your assets folder.
You can lift your server and log-into the app. You should see a blank table. Now open your web console and it should display some errors. This is due to the fact that the script you just copied are linked to the layout in no particular order. You can see this by looking at views/layout.ejs.1
2
3
4
5
6
7
8
9
10
11
<!--SCRIPTS-->
<script src="/js/dependencies/sails.io.js"></script>
<script src="/js/dependencies/backbone.js"></script>
<script src="/js/dependencies/bootstrap.js"></script>
<script src="/js/dependencies/jquery-1.11.1.js"></script>
<script src="/js/dependencies/perfect-scrollbar.js"></script>
<script src="/js/dependencies/underscore.js"></script>
<script src="/js/ExpenditureModel.js"></script>
<script src="/js/app.js"></script>
<!--SCRIPTS END-->
Here, backbone and bootstrap are included after jquery and underscore. To correct this, let’s take a look at tasks/pipeline.js. We will change jsFilesToInject such that our js files are included in the right order:
var jsFilesToInject = [
  // Underscore & jquery before backbone
  ‘js/dependencies/jquery-1.11.1.js’,
  ‘js/dependencies/perfect-scrollbar.js’,
  ‘js/dependencies/underscore.js’,
// Dependencies like jQuery, or Angular are brought in here
‘js/dependencies/*/.js’,
// The app classes before the app index
‘js/ExpenditureModel.js’,
// All of the rest of your client-side js files
// will be injected here in no particular order.
‘js/app.js’
];
1 | While we are here, change _templateFilesToInject_ such that it looks for **.ejs** files instead of **.html**. |
Save this file and if sails was running in background, the build tasks should run and now our js files should be included in the right order and our templates are compiled.
Now, let’s write real code. Open assets/js/app.js. This file contains already everything we need to handle the DOM of the page. What we’ll focus on is how to get data from the server and keep it in sync using Sails’ real-time capabilities. For simplicity we’ll do everything over the socket connection so that we don’t mix protocols.
We have a backbone expenditure collection that we’ll use to store our expenditures locally and propagate events.
First thing we’ll do is fetch a list of expenditures from the server. This is what io.socket.get is for.
Let’s add those models to our collection as soon as we get them.1
2
3
4
io.socket.get('/expenditure', function(models) {
  expenditures.set(models, {parse: true});
});
We pass the parse: true option to turn the date string into an actual date object.
Add some expenditures with the shortcut routes (for instance /create?amount=32&description=resto) and now you should see them displayed in the table like this:

If you can’t see the picture, that’s probably because you created a user before we told passport to get profile pictures of new users. Stop the server, delete .tmp/localDiskDb.db, then start the server again. Next time you log in, it will create a user from scratch and now your profile picture should be included with it.
Now it would be better if we could add expenditures directly from the app. We can insert the code that handles the create form submit action on line 58.
createForm.submit(formAction(createForm, function(formData) {
  io.socket.post(‘/expenditure’, formData, function(data, res) {
    if (res.statusCode === 201) {
      expenditures.add(new expenditures.model(data, {parse: true}));
    } else {
      console.log(data);
    }
  });
}));
1 | Here we use the _post_ method of our socket to create the model, then we check the status code and create a new model if everything went fine. If there was an error, we just log the response body. It would be better to have a proper error handling mechanism of course but we won't do that in this tutorial. |
That’s all we need to make our app real-time !
Now how about deleting items. We have an event handler for that on what should now be line 48 and I think you’ve guessed what we’ll write here.
io.socket.delete(‘/expenditure/‘+id, function(data, res) {
  if (res.statusCode === 200) {
    expenditures.remove(id);
  } else {
    console.log(data);
  }
});
1 |
|
Congratulations, you now have a fully functionnal app !
Now if you log-in as another user, the edit and delete actions are shown on expenditures you did not create. Of course, the server forbids this but it would be better if they were hidden. To do this, we’ll need to know which client is currently connected from the client-side javascript. The easiest way to do it is by adding a script in layout.ejs which injects a user object for the logged-in user in the client’s javascript scope. We need to be careful though as layout can be displayed even when the user is not logged in. Add this in views/layout.ejs right before the other scripts.1
2
3
4
<script type="text/javascript">
  var user = <%- JSON.stringify(req.user) || 'null' %>;
</script>
Now we can use this client object in our client-side scripts. Let’s edit assets/templates/expenditureItem.ejs, we will wrap the actions in an if statement like this:
<% // person is available as a template variable. user is taken from the global scope
 if (person.id === user.id) { %>
  [“>
](#)
[“>
](#)
<% } %>
`
Conclusion
From there, if you want to use mongodb as your data store, the only thing you need to do is put your configuration in config/connections.js and set that connection in config/model.js. I think it’s a really great framework with powerful features despite the fact it currently lacks contributors (and documentation).
I hope this tutorial gave you a good insight at how Sails works and that you’ll have fun building awesome app with it! Feel free to ask any question on twitter or add a comment below.
SailsJS tutorial | expenses tracking app (Part 3/4)
Previously in SailsJS tutorial:
- We created a Sails app and added authentication with passport
- We added our styles and less without worrying about compilation and linking
- We implemented a basic layout that shows the user’s login status
To be fair, the two last parts were actually pretty boring. But now comes the real fun: generating models and APIs. This is something Sails excels at and we’ll really feel like we are building something fast!
Generating models and APIs
When we used sails-generate-auth, we already created a User model. Now the fundamental model for an expenditures tracking app is… guess what ? Expenditures!
They have the following attributes:
- an amount to see how much was spent
- a date to sort them chronologically
- the person who paid
- and a description to remember what it was for
Remember: we do not model money exchange, as in “Alice paid XX$ to Bob”. Instead we model individual losses and earnings like this : “Alice spent XX$. Bob earned XX$” (it takes two records instead of one). It looks cumbersome for a group of two but for larger groups it performs better because a user doesn’t need to keep track of his debts for each individual person. Instead there’s just one number to sum everything up.
Anyway, let’s get back to our expenditures model. We will generate it using the command line tool1
sails generate api expenditure
This generates an empty Expenditure model and an empty ExpenditureController controller under api/.
It may seem quite useless but there’s actually a lot going on already. To demonstrate this, let’s just lift the server. Navigate to localhost:1337/expenditure and you see an empty JSON array. Try browsing to /expenditure/create?amount=39&description=foobar then get back to /expenditure. You just created a model!
You can update your model similarly by navigating to /expenditure/update/:id/? where :id is the id of your model and passing similar arguments as for create. You can destroy a model with /expenditure/destroy/:id/
Play around with it a little to get familiar and come back when you are done.
A quick note on security: these routes (/create, /update, /destroy) should never be used in production. They can be disabled by setting the property shortcut: false in config/blueprints.js. They are called shortcuts for it allows a developer to easily test his api but it is not meant to be used _by_ the app. The reason is, a crawler could find such url and visit it, thinking it will find a page but instead it will start messing with your data!
The right way to use the api is by using the appropriate HTTP terms (GET, POST, PUT, DELETE) like you’d do with backbonejs.
But, since sails is awesome, they built something special for you. If you go back to your homepage and open the web console, you see that Sails opens a websocket connection automatically. This socket can be used to perform queries. Instead of using classic HTTP queries, you can use io.socket.(get|post|put|delete). It has the same effect but acts through the socket.io connection!
Try the following in your web console. It should create a model then display the list of expenditures and finally destroy the first one it finds:1
2
3
4
5
6
7
io.socket.post('/expenditure', {amount: 42, description: "bought the hitchhiker's guide"}, function() {
  io.socket.get('/expenditure', function(expenditures) {
    console.log(expenditures);
    io.socket.delete('/expenditure/'+expenditures[0].id);
  })
});
Great, we wrote nothing and have a fully working REST API. It does a lot of things including things we don’t want. The fun thing here is that building an API with Sails consists mostly in having it not do what we don’t want it to do rather than trying to make it do things.
The API under control!
Let’s begin by defining model attributes as well as their types. This way we will force our records to conform to some predefined schema.
In config/model.js, add the line 1
2
3
4
5
6
7
8
9
10
11
12
13
14
15
16
17
18
19
20
21
22
23
24
25schema: true
```. This tells sails that it must follow strictly the schemas we are about to define.
Now in models/Expenditure.js, insert the following code to define the attributes we talked about earlier:
```javascript
module.exports = {
attributes: {
person : {
model: 'user',
required: true
},
amount : {
type: 'integer',
required: true
},
date : {
type: 'date',
required: true
},
description: {
type: 'string'
}
}
};
Also we will want our Users to have a picture attribute. To do this, add a picture attribute of type string. Your User model should look like this:1
2
3
4
5
6
7
8
9
10
11
var User = {
  // Enforce model schema in the case of schemaless databases
  schema: true,

  attributes: {
    username  : { type: 'string', unique: true },
    picture   : { type: 'string' },
    passports : { collection: 'Passport', via: 'user' }
  }
};
Note that the ‘schema: true’ attribute is optional now that we defined it in the global configuration.
Now you can restart the server and if you try to insert nonsense in the database, Sails won’t let you anymore.
Next, we’ll add some policies such that only logged in users can access the expenditures API.
In api/policies/sessionAuth.js replace the req.session.authenticated with req.isAuthenticated(). It should look like this now1
2
3
4
5
6
7
8
module.exports = function(req, res, next) {
  if (req.isAuthenticated()) {
    return next();
  }
  // User is not allowed
  return res.redirect('/login');
};
We will also add a custom policy to check when a user owns an expenditure record.1
2
3
4
5
6
7
8
9
10
11
12
13
14
15
16
17
// api/policies/ownsExpenditure.js
module.exports = function(req, res, next) {

  if (!req.isAuthenticated()) {
    return res.forbidden();
  }

  Expenditure.findOne(req.param('id')).exec(function(err, exp) {
    if (err) next(err);
    if (req.user.id === exp.person) {
      return next();
    } else {
      return res.forbidden();
    }
  });
};
To apply these policies, open config/policies.js and define how policies should be applied like this:1
2
3
4
5
6
7
8
/* ... */
ExpenditureController: {
  '*':      ['passport', 'ownsExpenditure'],
  'find':   ['passport', 'sessionAuth'],
  'create': ['passport', 'sessionAuth']
}
/* ... */
We allow find and create actions to anyone who is authenticated. Every other action can only be performed by someone who owns the target expenditure. Note that ownsExpenditure also checks that the user is authenticated so we don’t need to apply the sessionAuth policy in this case.
All right, now our app is a little more secure. But we are still taking user input as is without doing any verification on it. We need to implement the create action ourselves, this way we can manipulate user input before it is saved to our DB. The following code does exactly what the automagic action was doing for us before but in addition it also cleans the user input before feeding it to the model. Take a few minutes to understand exactly what happens here:1
2
3
4
5
6
7
8
9
10
11
12
13
14
15
16
17
18
19
20
21
22
23
24
25
26
27
28
29
30
31
32
33
34
35
36
37
38
39
40
41
42
// api/controllers/ExpenditureController.js
// ...
  create: function(req, res, next) {

    // Get only the attributes we want and apply defaults
    var data = {
      description: req.param('description'),
      amount: req.param('amount'),
      // The user is taken directly from the request element. This is what
      // passport gives us and the user cannot easily spoof this information
      person: req.user,
      // Parse the provided date or use current date if none is provided
      date: req.param('date') != null ? new Date(req.param('date')) : new Date()
    };

    // Create new instance of model using data from params
    Expenditure.create(data).exec(function(err, data) {
      if (err) return next(err);

      // The data field returned does not contain a fully populated
      // person attribute so we use the one at our disposal (req.user) to continue
      var expenditure = _.extend(data, {person: req.user});

      // You can always use this boolean to check if the request was issued on a
      // socket or standard HTTP request
      if (req.isSocket) {
        // Subscribe the current socket
        Expenditure.subscribe(req, expenditure);
        // Introduce all class listeners to this instance
        Expenditure.introduce(expenditure);
      }

      // Tell everyone listening that a model was created
      Expenditure.publishCreate(expenditure, req);

      // (HTTP 201: Created)
      res.status(201).send(expenditure.toJSON());
    });

  }
// ...
Now when a user is logged in and sends a request to create an expenditure, the model gets properly populated with the right ‘person’ attribute.
Your API is now complete! The last thing we are left with is implementing a front-end and we’ll be done. You may have noticed though that we did not override the update method. Therefore someone could still insert stupid data in our database. As an exercise, you can try implementing the update method such that it filters user input before inserting it in the database. You could start from the blueprint implementation. It contains many comments and it is a good way to learn more about sails and how it works.
In the next part, we’ll write a front-end for our sailsjs app.
SailsJS tutorial | expenses tracking app (Part 2/4)
In the previous part, we set up our application and added an authentication mechanism. It is now time to add our custom views and style. We will also use this opportunity to add dynamic content that changes when the user is logged in and an app page that can only be accessed by logged-in users (using policies).
Adding custom views
Download this archive containing the files you’ll need in this part.
Copy the contents of styles in the assets/styles/ folder of your project and the views in views/. Replace any file that causes a conflict, we don’t need the defaults anymore ;) .
You may have noticed these comments in view/layout.ejs1
2
3
<!--STYLES-->
<!--STYLES END-->
When you start sails, it will automatically watch for changes in your assets/ directory and link your stylesheets by adding the appropriate HTML tags there. This is done via grunt, you can have a look at the tasks/ folder if you are interested but we won’t detail much how these tasks work in this tutorial.
Now lift your app and refresh your browser. You should see a homepage like the one in the demo. The first thing you’ll notice though is that the title and the description appear as ‘app_name’ and ‘app_desc’. It’s time to introduce you with locales.
Locales
If you look at homepage.ejs, you will see that the title and descriptions are wrapped in a call to ___()_ . This function will look at your locales and see if it finds a translation for that string in the user’s language. If it cannot find one, it will use the default locale, otherwise it displays the text as is. Locales files are simply JSON files, one per language, that establish a mapping between keys and translated strings. They are located in config/locales. Copy the locales provided in the project archive to this folder. Also since I’ve only included an English and French translation, you can delete the es.json and_ de.json _locales and add this line in config/i18n.json1
locales: ['en', 'fr']
You’ll need to restart the app for these changes to be effective.
Showing login status
Now we’ll want our interface to change when the user is online. One thing we can do is displaying a login action in the navbar when the user is offline and a logout action when online. If you look at layout.ejs line 41 you should see a single login button. Let’s replace this with something more useful:
<% if (req.isAuthenticated()) { %>
<% } else { %>
<% } %>
1 | As you can see, we have access to the request object _req_ from the view and therefore we can know things about our user. Here we want to know if he is authenticated. Now you may wonder where this _isAuthenticated_ method comes from. We actually need to attach it to the req object. The best place to do this is in passport's policy since we apply this policy everywhere (remember it just allows us to initialize authentication stuff for the current request, it doesn't actually perform any kind of check). We add this function before calling _next()_ in _api/policies/passport.js_ so that it looks like this: |
Ok now restart your app, navigate to localhost:1337, log-in
Aaannnd it doesn’t work again…
Before you start throwing virtual stuff at me, just read why it went wrong:
If you look at your routes (/config/routes.js), you’ll see that our homepage view is served directly. This means the view is rendered without the request passing through any controller action. But policies are only applied to action routes! So we’ll need to create an action to display the home page since we want our passport policy to apply.
Using the command line, be sure to be at the root of your project and run1
sails generate controller main index app
This generates a controller called main with two actions index and app. We’ll use index to show the homepage and app to show the actual application page.
Open your newly created MainController (under api/controllers/) and replace the index action with the following:1
2
3
4
index: function (req, res) {
  return res.view('homepage');
},
Then last thing to do is tell sails to call our controller action when a user reaches ‘/‘. To do this, in config/routes.js remove the value assigned to ‘/‘ and add the following instead:1
2
3
'/': 'MainController.index',
'/app': 'MainController.app',
Note that we are also binding another route that will be useful later.
Now everything should work fine. Try logging-in and out a few times, the navbar updates accordingly.
All right, now we have our custom styles implemented and a basic layout for the app. We can start focusing on the core of the app. In the next part, we will create models and APIs to interact with data relevant to our app and we’ll implement access control to make this a little more secure.
SailsJS tutorial | expenses tracking app (part 1/4)
Hello internet,
If you know about SailsJS you also probably know there’s little resources out there to learn this framework. So I though it could be useful to share my personal experience with Sails.
This tutorial will cover the following topics:
- Third-party authentication with passport
- The assets pipeline
- Interfacing with a realtime JavaScript frontend
It should not take you more than an hour to complete and I guess it is particularly well suited for those who, like me, prefer to learn by example.
I assume you are already familiar with node and it’s better if you’ve already played a bit with express.
Motivation
In this tutorial, we will build a small app to streamline expenses management in groups.
You can check out a live demo here
(hint: open the app in two different windows to see the realtime component in action)
Everybody enters how much they paid for the group and how much they got from the group. Each person then gets a report telling how much they have to pay or how much people owe her.
Although our version will be pretty stupid I think it is interesting because we will add a realtime twist to it and also we’ll have to interface with third party auth providers so that the user doesn’t have to remember a password just for this app.
All right, let’s get started !
Generating the app
Sails comes with a handy command line tool that accelerates repetitive tasks. Install it with1
sudo npm install -g sails
That’s it you are now ready to get started !
cd to your workspace and run1
sails new myApp
This will create a sails application with default settings in a “myApp” folder.
cd into it and then simply run1
2cd myApp
sails lift
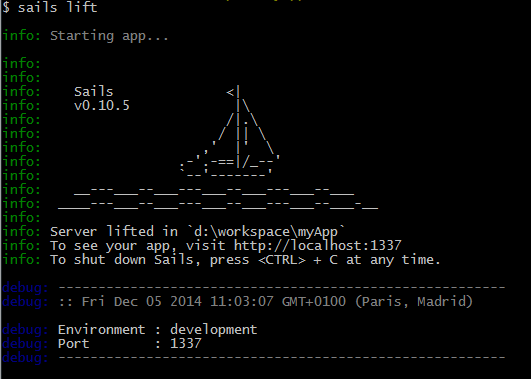
Now navigate to localhost:1337. You should see a nice homepage.
Authentication
While we are generating our app skeleton let’s deal with the authentication right now so we won’t have to worry about it later.
We will use a generator for that purpose. One good thing about sails is that you can do many things without writing explicit code, and when you have to do so, there’s a generator that writes it for you !1
sudo npm install -g sails-generate-auth
Now at the root of your app, generate auth stuff with1
sails generate auth
This generated a bunch of files, including a controller to handle login, logout and registration, a User model and a template config file. Now there’s still some configuration work to do.
First, in config/passport.js, you can see some of the supported auth strategies. For this demo we’ll use a third party provider. Pick your favorite one, comment out the other ones (including local) create an app on their website and come back with your app ID and SECRET. You’ll also need to add a “profileFields” property to tell passport what information you want it to fetch on registration.
I used facebook and it gives me something like this:1
2
3
4
5
6
7
8
9
10
11
12
13module.exports.passport = {
facebook: {
name: 'Facebook',
protocol: 'oauth2',
strategy: require('passport-facebook').Strategy,
options: {
// Don't forget to add this line
profileFields: ['id', 'displayName', 'photos', 'username', 'email'],
clientID: 'MY_APP_ID',
clientSecret: 'MY_APP_SECRET'
}
}
};
Next thing you’ll have to do is open config/routes.js and add these routes:1
2
3
4
5
6
7
8
9
10
11
12
13
14
15
16// There should already be this:
'/': {
view: 'homepage'
},
// So you just need to add that:
'get /login': 'AuthController.login',
'get /logout': 'AuthController.logout',
'get /register': 'AuthController.register',
'post /auth/local': 'AuthController.callback',
'post /auth/local/:action': 'AuthController.callback',
'get /auth/:provider': 'AuthController.provider',
'get /auth/:provider/callback': 'AuthController.callback',
'get /auth/:provider/:action': 'AuthController.callback',
This wires up the AuthController you generated two minutes ago to sail’s HTTP router by binding HTTP routes to the appropriate controller actions.
All right you’re almost there, we’ll now open config/bootstrap.js and change the contents with this:1
2
3
4module.exports.bootstrap = function(cb) {
sails.services.passport.loadStrategies();
cb();
};
This function is called when you lift your app allowing you to perform initial loading. Here we tell passport to load the strategies we specified in config/passport.js.
You now have a working authentication mechanism integrated in your app ! The last thing to do is to add the passport policy to all routes. This tells sails that every incoming request should go through passport’s middleware before reaching any controller. The middleware will transparently take care of associating sessions with users so that you can user req.user to know who you are dealing with in your controller and views.
To do so, add the following line in config/policies.js1
'*': [ 'passport' ]
All right, you’re done, now let’s lift the app again…
Aaaand it fails.
What happened is that the generator generates the code for you but doesn’t install the required modules. You’ll need the following modules:1
npm install --save passport passport-facebook validator bcryptjs
OK now you can lift and it should work. You will be asked the data migration mode, choose any option it doesn’t matter. You can turn this off by uncommenting the line migrate: ‘alter’ in config/models.js
Navigate to /login, log in the app and you should be redirected to the homepage. You cannot see your login status yet but don’t worry this will come in the next part.
If you are still with me at this point, congratulations ! You just did the hard part. With this in place, we can start doing fun stuff and see how Sails really saves us huge amounts of time.
In the next part, we will remove this ugly homepage and add our own views, we will also add assets and see how sails assets pipeline makes your life easier.
View all posts