Hello internet,
If you know about SailsJS you also probably know there’s little resources out there to learn this framework. So I though it could be useful to share my personal experience with Sails.
This tutorial will cover the following topics:
- Third-party authentication with passport
- The assets pipeline
- Interfacing with a realtime JavaScript frontend
It should not take you more than an hour to complete and I guess it is particularly well suited for those who, like me, prefer to learn by example.
I assume you are already familiar with node and it’s better if you’ve already played a bit with express.
Motivation
In this tutorial, we will build a small app to streamline expenses management in groups.
You can check out a live demo here
(hint: open the app in two different windows to see the realtime component in action)
Everybody enters how much they paid for the group and how much they got from the group. Each person then gets a report telling how much they have to pay or how much people owe her.
Although our version will be pretty stupid I think it is interesting because we will add a realtime twist to it and also we’ll have to interface with third party auth providers so that the user doesn’t have to remember a password just for this app.
All right, let’s get started !
Generating the app
Sails comes with a handy command line tool that accelerates repetitive tasks. Install it with1
sudo npm install -g sails
That’s it you are now ready to get started !
cd to your workspace and run1
sails new myApp
This will create a sails application with default settings in a “myApp” folder.
cd into it and then simply run1
2cd myApp
sails lift
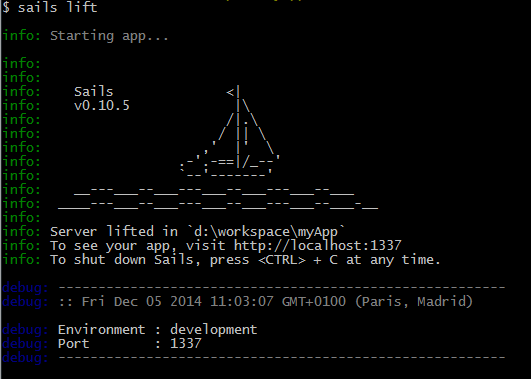
Now navigate to localhost:1337. You should see a nice homepage.
Authentication
While we are generating our app skeleton let’s deal with the authentication right now so we won’t have to worry about it later.
We will use a generator for that purpose. One good thing about sails is that you can do many things without writing explicit code, and when you have to do so, there’s a generator that writes it for you !1
sudo npm install -g sails-generate-auth
Now at the root of your app, generate auth stuff with1
sails generate auth
This generated a bunch of files, including a controller to handle login, logout and registration, a User model and a template config file. Now there’s still some configuration work to do.
First, in config/passport.js, you can see some of the supported auth strategies. For this demo we’ll use a third party provider. Pick your favorite one, comment out the other ones (including local) create an app on their website and come back with your app ID and SECRET. You’ll also need to add a “profileFields” property to tell passport what information you want it to fetch on registration.
I used facebook and it gives me something like this:1
2
3
4
5
6
7
8
9
10
11
12
13module.exports.passport = {
facebook: {
name: 'Facebook',
protocol: 'oauth2',
strategy: require('passport-facebook').Strategy,
options: {
// Don't forget to add this line
profileFields: ['id', 'displayName', 'photos', 'username', 'email'],
clientID: 'MY_APP_ID',
clientSecret: 'MY_APP_SECRET'
}
}
};
Next thing you’ll have to do is open config/routes.js and add these routes:1
2
3
4
5
6
7
8
9
10
11
12
13
14
15
16// There should already be this:
'/': {
view: 'homepage'
},
// So you just need to add that:
'get /login': 'AuthController.login',
'get /logout': 'AuthController.logout',
'get /register': 'AuthController.register',
'post /auth/local': 'AuthController.callback',
'post /auth/local/:action': 'AuthController.callback',
'get /auth/:provider': 'AuthController.provider',
'get /auth/:provider/callback': 'AuthController.callback',
'get /auth/:provider/:action': 'AuthController.callback',
This wires up the AuthController you generated two minutes ago to sail’s HTTP router by binding HTTP routes to the appropriate controller actions.
All right you’re almost there, we’ll now open config/bootstrap.js and change the contents with this:1
2
3
4module.exports.bootstrap = function(cb) {
sails.services.passport.loadStrategies();
cb();
};
This function is called when you lift your app allowing you to perform initial loading. Here we tell passport to load the strategies we specified in config/passport.js.
You now have a working authentication mechanism integrated in your app ! The last thing to do is to add the passport policy to all routes. This tells sails that every incoming request should go through passport’s middleware before reaching any controller. The middleware will transparently take care of associating sessions with users so that you can user req.user to know who you are dealing with in your controller and views.
To do so, add the following line in config/policies.js1
'*': [ 'passport' ]
All right, you’re done, now let’s lift the app again…
Aaaand it fails.
What happened is that the generator generates the code for you but doesn’t install the required modules. You’ll need the following modules:1
npm install --save passport passport-facebook validator bcryptjs
OK now you can lift and it should work. You will be asked the data migration mode, choose any option it doesn’t matter. You can turn this off by uncommenting the line migrate: ‘alter’ in config/models.js
Navigate to /login, log in the app and you should be redirected to the homepage. You cannot see your login status yet but don’t worry this will come in the next part.
If you are still with me at this point, congratulations ! You just did the hard part. With this in place, we can start doing fun stuff and see how Sails really saves us huge amounts of time.
In the next part, we will remove this ugly homepage and add our own views, we will also add assets and see how sails assets pipeline makes your life easier.